I’ve just finished building the amazing Lego Bugatti Chiron. It’s by far the most complex Lego kit I’ve ever assembled. But is it worth the hefty price tag? Here’s what I thought.
1989 was an outstanding year for me. For my birthday, mom and dad brought me Lego set 8895. The Test Car was the first Lego Technic set I built—and it still holds a special place in my heart. Years later, Katie and I spent a few evenings rebuilding the car. It was much harder than I remembered. I’m surprised that geeky nine-year-old kid was able to build it.
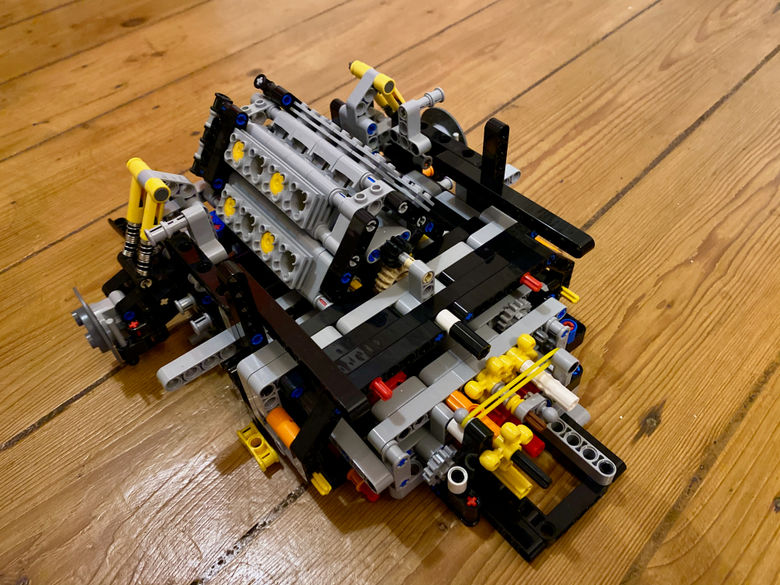
The Lego Bugatti is in a different league entirely to that old Test Car kit. But it still has the same DNA. Indeed, it has many identical parts. The engine blocks, for example, made me feel especially nostalgic.
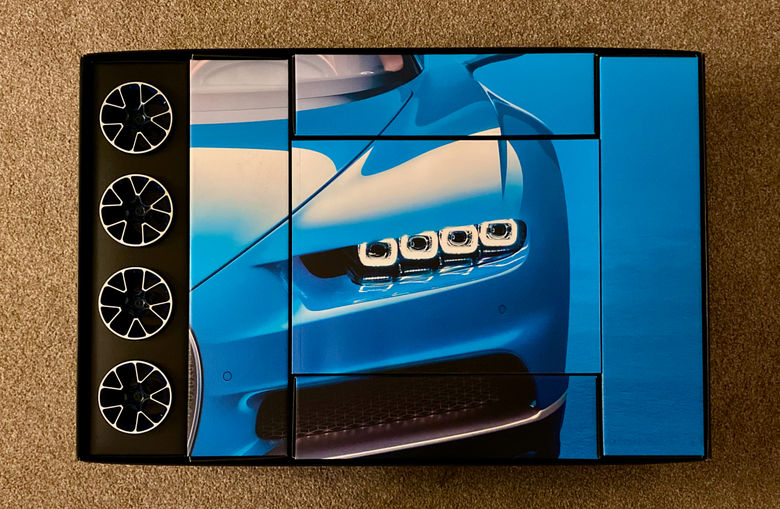
The packaging is incredible. Open the box, and you’re greeted with 6 smaller boxes. Printed either side, you can flip 'em and see the front or back of the car. Flipping through the two beefy instruction manuals gave me some idea of what a mammoth build this was going to be.
First up is building the rear differential and suspension. Then the difficulty is ramped up sharply with the gearbox and engine. This was by far the most fun bit of the whole car. Once the power plant is finished, you move on to the front of the vehicle. With its paddle-shift gears and complex steering column, this is also an enjoyable bit of the build.
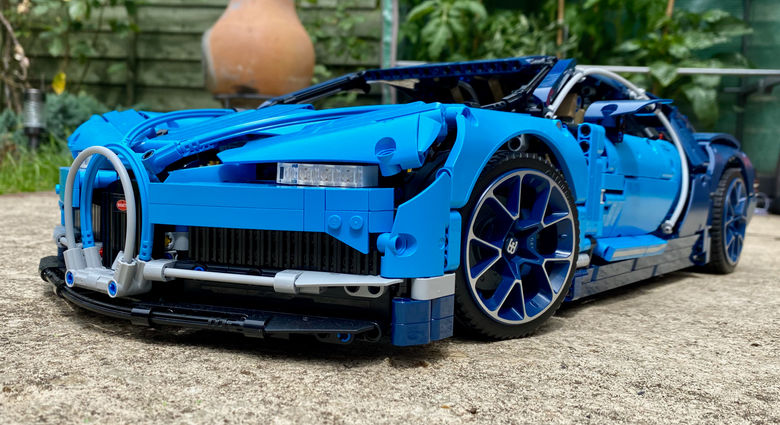
Just like the real Chiron, the Lego model undergoes a process known as “the marriage”. This means connecting the rear to the front. To do so, you have to make sure that all rods and connectors are aligned correctly. Then, pushing one half into the other. This was a lovely touch and made me feel (kind of) like a real engineer.

So far, the model had consumed my evenings for over a week. I’d enjoyed myself immensely, losing myself in the details. With book one finished, I moved on to book 2: The bodywork and interior.
The second half of the build was less engaging than the first. This was for a few reasons. For a start, it was less complicated. Slotting together all the intricate cogs in the gearbox and engine really reminded me of what I loved about Lego Technic as a kid. But the bodywork had none of that complexity, so started to feel like a bit of slog to finish.
Another reason was Lego’s surprising decision to provide stickers, rather than print decals directly onto the parts. A few bits—like the wheel badges—had been direct-printed. But the stickers felt like they cheapened the model somewhat.
Finally, there’s an overall flimsiness to the model—especially the doors, which are quite heavy but only held on by a single joint. I felt slightly disappointed. But not too much. After 2 weeks of work (around 15 hours), I finished the Bugatti. I have to admit that—despite the problems I’ve mentioned—I absolutely loved building this model.
In summary
The Lego Bugatti Chiron was crazy fun to build. Especially the sophisticated powerplant, gearbox and drivetrain. It’s let down a bit by the flimsy body panels and cheap looking stickers. Overall though, I’d recommend this for any Lego Technic fans. Especially those overgrown kids (like me) who want to recapture a bit of their childhood.